Saturday, August 11, 2012

Black Rock Shooter Photoshoot, Part 3 - MZMA

Poor Cosplay-vania.  I've totally left you abandoned.  Q_Q  You need a good old-fashion post to get you back on track.  And so, without further ado, the continuation of our picture-fest from our Black Rock Shooter photoshoot (again, shot by the wonderful Bryan Regan) with my MZMA pictures.


 I love the angle of this next one :)


And this next one is my favorite one of this cosplay.  ACTION SHOT! :P


And finally, one group shot where we all look awesome :D


This photoshoot was amazing, and wouldn't have been nearly as fulfilling without Mimi and Kathryn, and our photographer Bryan Regan!  Thanks everyone!

-Stuart-

Sunday, July 15, 2012

Black Rock Shooter Photoshoot, Part 2- Black Gold Saw

After a week of blerg (that's actually the technical term), I'm finally getting around to posting my pictures from our Black Rock Shooter group cosplay.  So without further ado, here's the second set of photos from the photoshoot with the wonderful Bryan Regan!

You know how much fun it was getting up onto that platform?  Not.
Model pose GO

That sword is ridiculously difficult to hold up with one hand.  That is my intense concentration face.

Why hello wig, after a day of conning you don't look so good.   Creepy factory makes up for it though.
Dramatically stare into the distance.  This is an important skill.

I think I may have been singing here. 
Totally not slipping on the gravel.  Definitely an intentional pose.  Definitely.

You're damn RIGHT there's no trespassing.

Ridiculously well-timed walking picture.

AWWW YEAH, cue dramatic wind blowing my hair.  And, you know.  Cars.

Batter up!  Swing batter batter SWING 
>__<
And just for fun...

I think you're doing it wrong.

Herp derp.  
Guitar sword?  Yes please.
More group shots and MZMA pictures to come!

~Kathryn

Friday, July 6, 2012

Black Rock Shooter photoshoot with Bryan Regan part1 Insane Black Rock Shooter

Hi guys, no time no post...>.> but today's post is pretty awesome!  I'm here to share with you guys some photos from our Black Rock Shooter photoshoot with Bryan Regan, a local professional photographer who we had a wonderful opportunity to work with.  

Below are photos of me as Insane Black Rock Shooter for Animazement 18.   Remember, you will see a bigger photo if you click on it :D


we took these pictures near the train tracks about 10min away from the Raleigh convention center.  The location was great, but Bryan's lighting skills are even better! 


I'm really happy that this photo shows the blue streak in my hair.  It took me a while to sew them in ^.^


Close up of my face........wahhhhhhhhhhhh =_=;


and here are some outtakes:

my hair and shoulder piece fell off >.>

dude, I'm trying to say something here!

The broken Insane Blade Claw Q_Q
Many many many thanks to Bryan Regan for dealing with our ridiculous personalities!!  Stay tuned for more awesome photos from Bryan of Black Gold Saw and MZMA.  I promise there will also be crazy photos from Katsuya Weller coming soon as well!  :D

Mimi

Tuesday, July 3, 2012

Contacts Review, Ahoy!

So I thought that I would do a brief review of the contacts I used (or in one case, tried to use) for the Minene Uryuu and Black Gold Saw cosplays.  Since I have green eyes, sometimes it's difficult to know for sure how contacts will look on me, so I feel like these kinds of reviews come in handy on occasion.

Green eyes are green.  I swear that I never used to take these silly mirror pictures before this blog started...

Both of these sets of contacts were ordered from Pinky Paradise, pretty much my go-to place for colored contacts.  In addition, as I can see approximately three inches in front of my face without corrective lenses, both of these contacts come with strong prescriptions.

Black Gold Saw: Vassen Ruby Red 

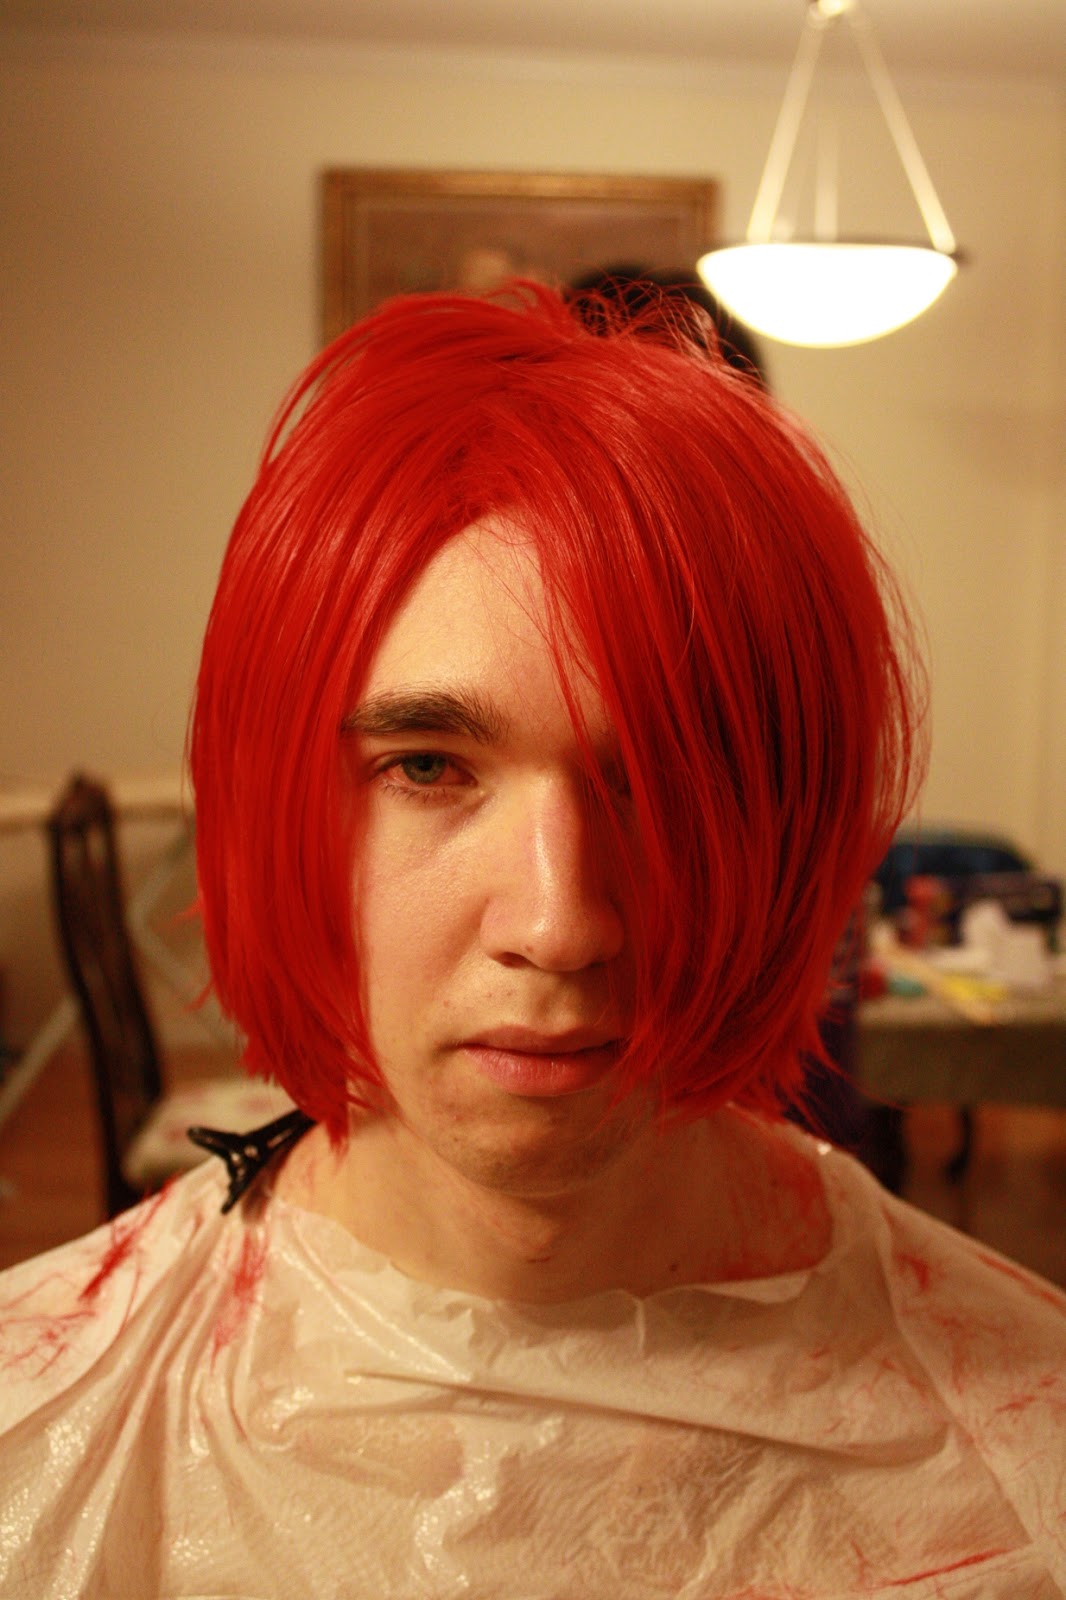
EYEBROWS, WHY U NO MATCH WIG HAIR
You can see my natural eye color around the center of the pupil, but it actually looks pretty interesting.  You can't tell from this picture, but they actually do look a bit more red than they appear here.  They were very comfortable - I wore them for at least 10 hours (although you are definitely not supposed to do that), and I felt no discomfort whatsoever.  It felt like I was just wearing my normal contacts.

Minene Uryuu: E.O.S. Dolly Eye Violet 

...Well.  I'm afraid there will be no pictures of myself in these contacts.  I'm not sure what was wrong with them, but I could not for the life of me get them in my eyes without experiencing an intense burning that preceded immediate removal, on pain of death.  I had hoped it was a fluke, but I tried to put the contacts in three times that day, and each time I encountered the burning fire of a thousand suns...in my eyeballs.  

  Now imagine this in your eyes.  This horrible color that makes your eyes burn?  Yes.  Just like that.  Times a thousand.
I contacted Pinky Paradise about this, and they indicated that in order to give a refund or replacement that they would need pictures of the contacts and the bottles they came in with the expiration date visible.  As I had never had a problem with Pinky Paradise lenses before, I hadn't made a habit of taking pictures before opening the contacts, so I was unable to get a refund.  In the future I will remember to take lots of pictures, and I would recommend that others do the same.  Regardless, I have gotten many great contacts from Pinky Paradise and have never had any problems before, so I will write this off as a fluke.  

So what have I learned?  
1. Always takes pictures of the contacts you receive before you open them.  
2. Don't put things in your eyes that do not belong there.  Your eyes will tell you.  Vehemently.  
3. The bathrooms at Animazement have terrible lighting for re-applying makeup after your eyes have been watering.  Bring a compact mirror.  

And just because I can:

Well put.
~Kathryn

Friday, June 29, 2012

MZMA Cosplay - Wig

Yo people!

So today I'm going to post some pics of how we styled the wig for MZMA (and by we I mean Mimi).  Now I know that Gachapin's modeling images are still well within your memory, but for reference here he is modeling the CosplayWigsUSA wig we purchased.


...and here it is sitting on m head, uncut and unstyled.


And now the cuts!   Mimi did an awesome job shaping MZMA's wig to what it should look like.  Much was taken off of the front and back.

 And after feathering the wig and giving it some volume, here's what it looked like (notice the little tuft of hair in the back):

[Just as a side note, if you wear a plastic garbage bag on your body while you get your hair/wig cut and styled, you will desperately need to shower afterwards (SOOOO SWEATY XD).]


I think wig turned out awesomely accurate!  The black spinal headpiece was attached with three wig clips.  The wig clips worked well for keeping the headpiece in place, but in practice, only about one was needed.

Thanks to Mimi for all of her hair-cutting expertise and patience!
We'll be back to post more cosplay pics soon, and hopefully we can show you some of our completed costumes :D

THANKS!

-Stuart-

Monday, June 11, 2012

Insane Black Rock Shooter cosplay part 5: the breast plate tutorial

Hi guys!  Now that I have caught a mild cold from Stuart, I finally have some time to sit down and make another IBRS progress report (kinda late lol).  I think this would be useful for whoever is trying to make light-weight armors.

First, let's recap.  I have already shown you the fun foam pieces I made out of a modified shirt pattern I had:

in order to make them with a little bit of depth to look like the armor IBRS is wearing, I had to add more layers of foam.
This gives you an idea of how thick the breast plate is
Comparatively speaking, the armor I made was not nearly as thick as the figure's.  Next time, I would probably use something like a thick yoga mat to make the armors.

The foam I found in Scrap Exchange that I used for the middle section to add thickness to the armor.  I cut it according to the pattern I already made.

Hot glue the thicker foam onto the already existing fun foam layer

add tape to get rid of bumpy areas and glue another layer of fun foam on top of the grey foam.

This is what the back looked like, I used some masking tape to hold the layers while the glue was drying.  I have not found anything better than hot glue yet to stick foam together.

Smoothing out the gaps by filling it with hot glue and scrape the surface with a piece of card

details on the filled gap

then mod podge the surface to prep it for contact paper

I also taped the edges with black electric tape to hide the grey foam.  I think model magic would work as well and make less creases, but I didn't have any at that moment.

with the contact paper glued on.  Contact paper sticks really well to craft foam once you mod podge it.  However, it becomes extremely unforgiving with mistakes.  Make sure you have a card ready to squeeze out those bubbles.

pieces of the back armor, I made this a little thinner because it would bend more easily for a better fit that way.

mod podge

with electric tape and contact paper.

The basic breast plate is finished.
The sides are held together with elastic and Velcro.  Do buy the industrial grade Velcro, because the regular ones just won't be sticky enough to hold the armors together.

After few adjustments, I added more details to the breast plate and voila!  Oh also, since craft foam can kind of hold a shape after it is been heated, I recommend heating it and bending it before you apply mod podge and contact paper.  They will become rather...burnt.
This displays all of the armor pieces I made for the cosplay.  I did acquire some thicker craft foam from Michael's later on that I used for some of the leg armors.  Other than that, the shoulder piece and some of the arm pieces are all thickened with the method described above.  I wanted to show you guys the details for my other armor pieces, however, I was too busy to take photos and this is the only one I have now.  Q_Q

Anyhow, let me know if you have any questions!!!

btw, I'm doing this Otaku House contest right now for this costume, please vote for me!!!  Thank you!

- Mimi -

Insane Black Rock Shooter Cosplay Progress:
Part 1 | Part 2 | Part 3 | Part 4
Related Posts Plugin for WordPress, Blogger...